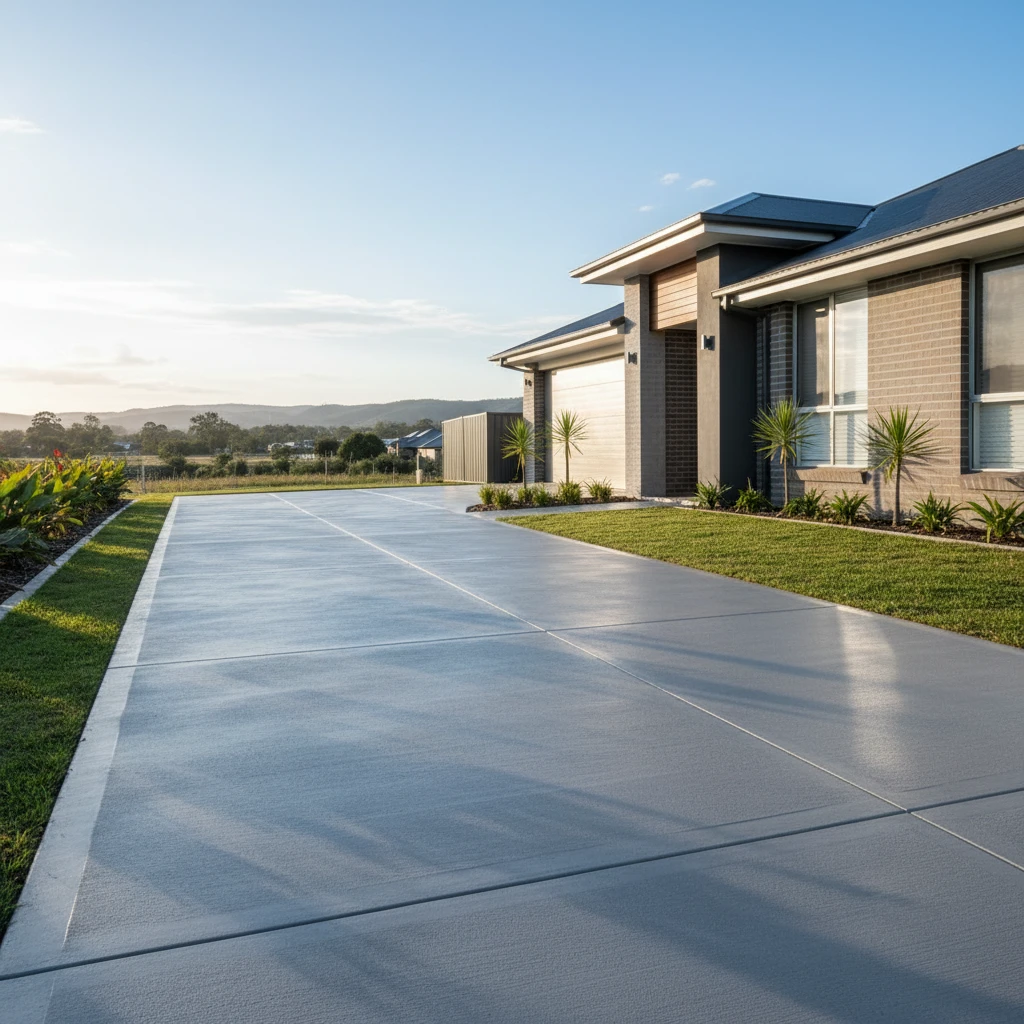
A shed slab is more than just a concrete platform; it’s the bedrock of your shed’s stability and longevity. In Penrith, the Blue Mountains, and the Central West, where diverse soil conditions and weather patterns prevail, a poorly constructed slab can lead to a host of problems down the line. That’s why understanding the critical steps of excavation, formwork, and reinforcement is essential for ensuring your shed stands the test of time.
This guide dives deep into the processes involved in constructing a durable and reliable shed slab. We’ll explore the key considerations at each stage, from initial site preparation to final reinforcement, providing you with the knowledge needed to achieve a solid foundation for your shed project.
Why a Properly Constructed Shed Slab is a Must-Have for Penrith & Beyond
Protecting Your Investment: The Long-Term Benefits
Investing in a well-constructed shed slab provides numerous long-term benefits. Firstly, it offers superior protection against moisture. A properly designed and installed slab acts as a barrier, preventing water from seeping into your shed and damaging stored items. This is particularly important in regions like the Blue Mountains, where rainfall can be substantial. Secondly, a solid slab provides a stable and level surface, preventing structural issues such as warping or leaning. This ensures the shed doors and windows operate smoothly and that the overall integrity of the shed remains intact. Finally, a robust slab adds value to your property. It demonstrates that the shed was built with quality and longevity in mind, making it a more attractive feature for potential buyers. The long-term durability you gain avoids future repair costs, often exceeding the initial investment in a quality slab. Consider it preventative maintenance from day one. For example, upgrading from a basic 4-inch slab to a reinforced 5-inch slab might add 15% to the initial cost but could double the lifespan of the structure, saving significantly on future repairs and replacements.
Avoiding Common Problems: From Cracking to Subsidence
Several common problems can plague poorly constructed shed slabs. Cracking is a frequent issue, often caused by inadequate base preparation, insufficient reinforcement, or improper curing. Subsidence, or sinking, can occur due to unstable soil conditions or inadequate compaction. These problems can lead to structural damage to the shed itself, including warped walls, sticking doors, and compromised weatherproofing. Poor drainage can cause water to pool around the slab, leading to dampness and potential rot. Preventing these issues requires careful planning and execution. Proper site preparation is crucial, including removing organic matter and compacting the soil thoroughly. Correct reinforcement, such as steel mesh or rebar, is essential for distributing weight and preventing cracks. Effective drainage solutions, such as sloping the slab slightly away from the shed, are also vital. Choosing the right concrete mix, appropriate for the intended load and environmental conditions, is also key. Consulting a concreting professional for advice on soil types and reinforcement requirements in your specific area can help avoid costly mistakes. For example, a poorly prepared base on reactive clay soils common in parts of the Central West can lead to significant cracking within a few years.
Meeting Local Council Requirements: Compliance is Key
Before commencing any shed construction, it’s crucial to check with your local council regarding building regulations and permits. Councils such as Penrith City Council and Blue Mountains City Council have specific requirements for shed slabs, including minimum thickness, reinforcement specifications, and drainage considerations. Ignoring these requirements can result in fines, delays, or even the need to demolish and rebuild the slab. Ensure that your design complies with the National Construction Code (NCC) and any relevant Australian Standards. Obtaining the necessary permits can involve submitting detailed plans and specifications, including site plans, structural drawings, and engineering certifications. It’s wise to engage a qualified engineer or building surveyor to ensure compliance and navigate the approval process smoothly. Failure to comply can also impact your insurance coverage, should any structural issues arise in the future. Local council websites offer detailed guidance on shed construction regulations, and it is highly recommended to consult these resources early in the planning process. See your local Council website for current requirements.
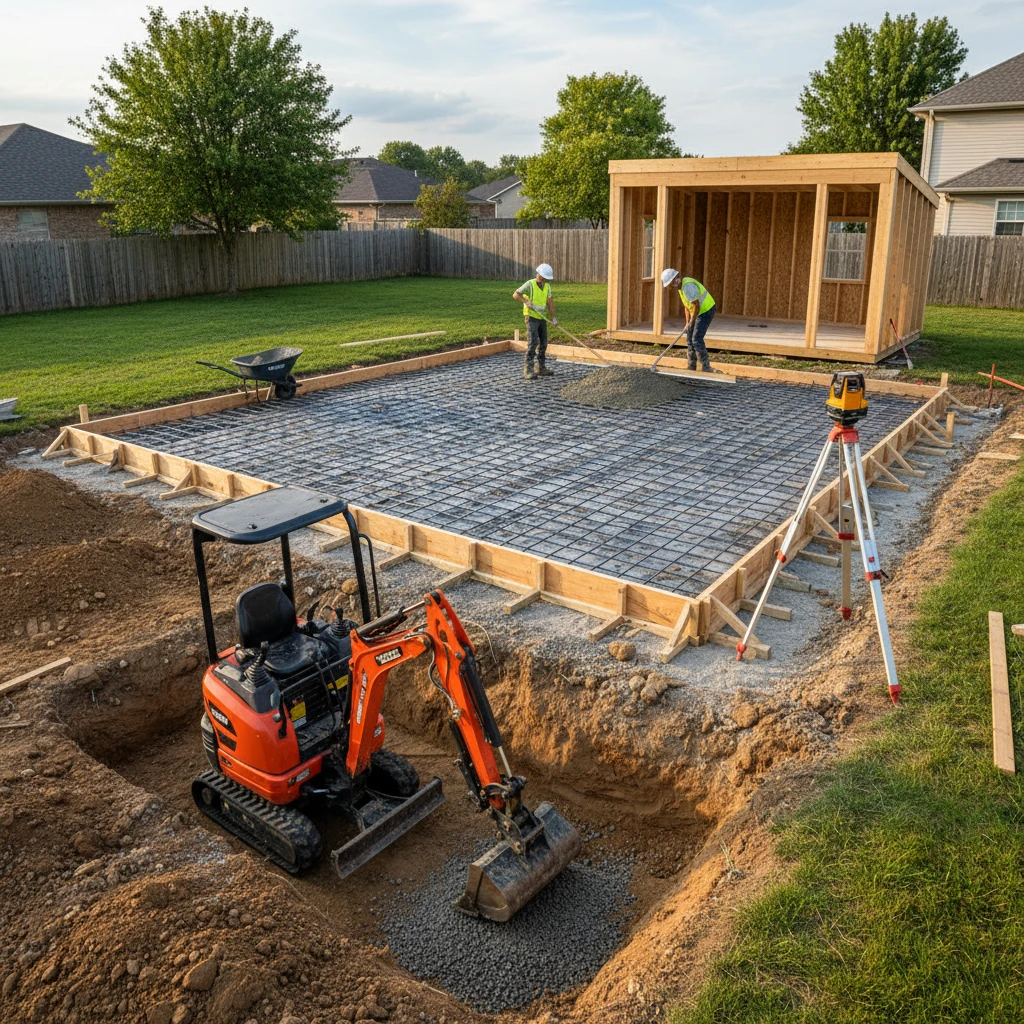
Step 1: Excavation – Laying the Groundwork for a Solid Slab
Site Preparation: Clearing Vegetation and Removing Topsoil
The first crucial step in preparing for a shed slab is proper site preparation. This involves clearing all vegetation, including grass, weeds, and shrubs, from the area where the slab will be poured. Remove all roots to prevent future growth that could disrupt the slab. Next, strip away the topsoil, which typically contains organic matter that can decompose and cause the slab to settle unevenly. The depth of topsoil removal will depend on the soil type and the amount of organic material present, but generally, removing at least 100-150mm is recommended. Use a shovel, pickaxe, or excavator, depending on the size of the area, to remove the vegetation and topsoil. Dispose of the removed material properly, ensuring it doesn’t contaminate surrounding areas. Compacting the exposed subsoil is critical after removing the topsoil. Use a plate compactor or roller to achieve a firm and stable base. This prevents settling and ensures the slab has a solid foundation to rest on. Proper site preparation is the cornerstone of a durable and long-lasting shed slab.
Accurate Levelling: Achieving the Correct Slope and Drainage
Accurate levelling is paramount for ensuring proper drainage and preventing water pooling around your shed slab. The goal is to create a slight slope away from the shed, typically around 1-2%, to allow water to run off easily. Use a laser level or traditional spirit level to establish a consistent grade across the excavation area. Drive stakes into the ground at regular intervals and use a string line to guide the levelling process. Fill in low spots with compacted gravel or crushed rock, and remove excess soil from high spots. The key is to achieve a uniform slope that directs water away from the shed’s foundation. In areas with heavy rainfall, consider incorporating a drainage system, such as a French drain, to further manage water runoff. Remember to account for the thickness of the concrete slab when levelling, ensuring that the finished surface will be at the desired height. Double-check your measurements and slope with a level before moving on to the next stage. For large slabs, it may be necessary to use surveying equipment to ensure accurate levelling over the entire area.
Dealing with Difficult Terrain: Slopes, Rocks, and Tight Access
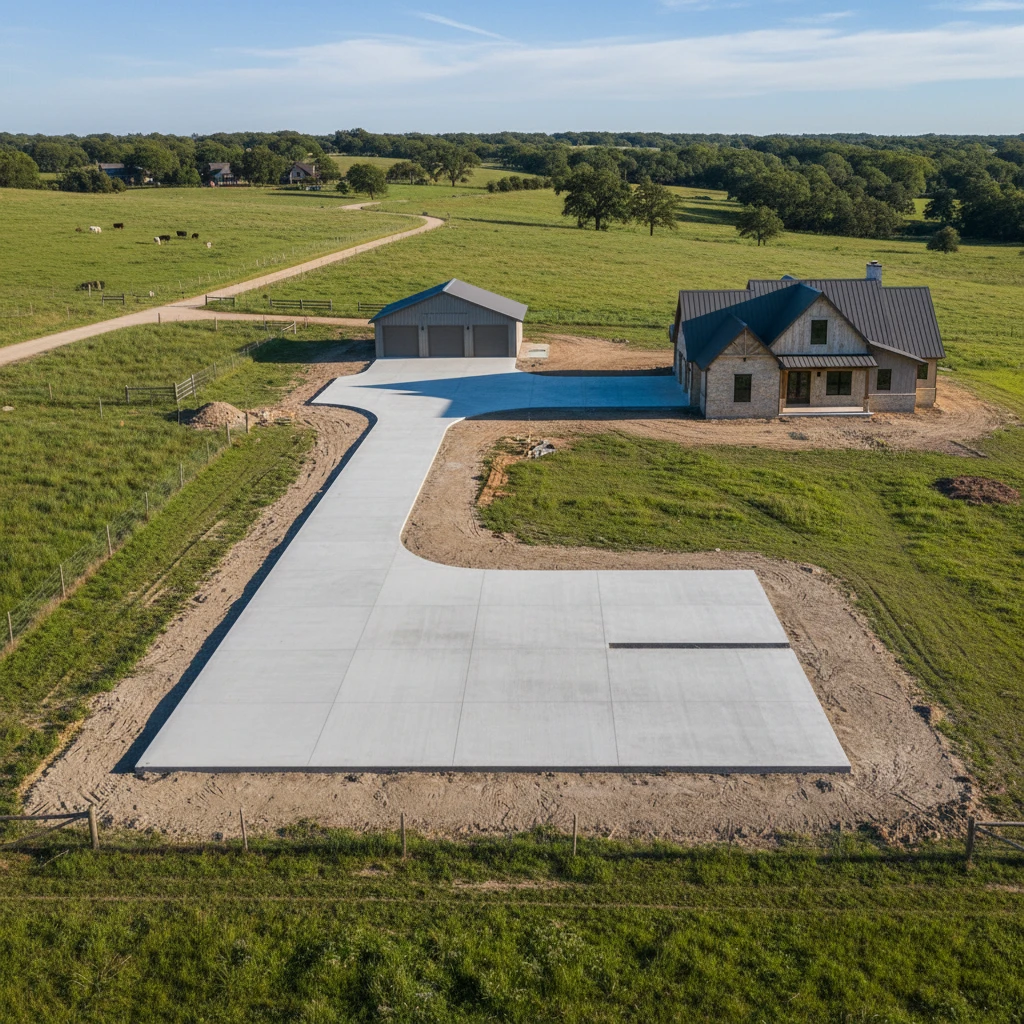
Many properties in Penrith, the Blue Mountains, and the Central West feature challenging terrain, including slopes, rocks, and tight access. When dealing with slopes, consider terracing the site to create a level platform for the shed slab. This involves excavating and building retaining walls to support the terraced area. When encountering rocks, you may need to use heavy machinery, such as an excavator with a rock breaker attachment, to remove them. If the rocks are too large to remove, consider building the slab around them or adjusting the shed’s design to accommodate them. Tight access can pose significant logistical challenges. Smaller excavators and concrete pumps may be required to navigate narrow pathways and confined spaces. Coordinate with suppliers to ensure materials can be delivered efficiently and safely. In some cases, it may be necessary to use manual labor to move materials and equipment. Thorough planning and careful consideration of the site’s specific challenges are essential for overcoming difficult terrain. Situations like these are where the expertise of a local excavation specialist, such as those you can find at Laser Concrete, becomes invaluable.
Step 2: Formwork – Creating the Slab’s Shape and Boundaries
Choosing the Right Materials: Timber vs. Steel Formwork
Formwork creates the mould that contains the wet concrete as it sets. The choice between timber and steel formwork depends on several factors, including the size and complexity of the slab, the budget, and the desired finish. Timber formwork is typically more cost-effective for smaller, simpler slabs. It’s readily available, easy to cut and shape, and can be reused multiple times. However, timber is susceptible to warping and damage from moisture, and it may not provide as smooth a finish as steel. Steel formwork is more durable, provides a cleaner, more consistent finish, and can be used for larger, more complex slabs. It’s also more resistant to warping and damage, making it a longer-lasting investment. However, steel formwork is more expensive than timber and requires specialized tools and equipment to assemble and dismantle. Consider the project’s specific requirements and weigh the pros and cons of each material before making a decision. For example, for a small backyard shed slab, timber might be sufficient, whereas a large workshop slab might benefit from the precision and durability of steel formwork.
Ensuring Accuracy: Precise Measurements and Alignment
Accuracy is critical when setting up the formwork. Precise measurements and alignment are essential for ensuring that the slab is the correct size and shape and that it’s level and square. Use a tape measure, level, and square to accurately measure and mark the dimensions of the slab. Ensure that the formwork is aligned with the established reference points and that it’s level across the entire area. Use stakes and braces to support the formwork and prevent it from shifting during the concrete pour. Double-check all measurements and alignments before pouring the concrete. Even small errors can result in significant problems down the line, such as uneven surfaces, misaligned walls, or structural weaknesses. For larger slabs, consider using surveying equipment to ensure accuracy over longer distances. Careful attention to detail during this stage will pay dividends in the form of a well-constructed and aesthetically pleasing shed slab. It is essential to use a reliable measuring tool; a worn or damaged tape measure can introduce unacceptable errors.
Bracing and Support: Preventing Formwork Failure During Pouring
Adequate bracing and support are crucial for preventing formwork failure during the concrete pour. The weight of the wet concrete can exert tremendous pressure on the formwork, and if it’s not properly braced, it can collapse, resulting in a messy and costly disaster. Use sturdy stakes and braces to reinforce the formwork at regular intervals. Ensure that the stakes are driven deep into the ground and that the braces are securely attached to the formwork. Pay particular attention to corners and areas where the formwork is subject to the most pressure. Consider using additional supports, such as plywood or timbers, to distribute the load. Before pouring the concrete, inspect the formwork thoroughly to ensure that all braces and supports are in place and that there are no weak points. As the concrete is poured, monitor the formwork closely for any signs of movement or instability. If any issues arise, stop the pour immediately and reinforce the formwork before proceeding. A properly braced and supported formwork system is essential for ensuring a successful and safe concrete pour.
Step 3: Reinforcement – Adding Strength and Durability
Selecting the Appropriate Reinforcement: Steel Mesh or Rebar
Reinforcement is a critical component of a shed slab, adding strength and durability to the concrete. The two most common types of reinforcement are steel mesh and rebar (reinforcing bar). Steel mesh, typically made of welded wire, is suitable for lighter loads and thinner slabs. It’s easy to install and provides good crack control. Rebar, on the other hand, is stronger and more suitable for heavier loads and thicker slabs. It’s typically used in situations where greater structural integrity is required. The choice between steel mesh and rebar depends on the size and intended use of the shed, as well as the soil conditions and local building codes. Consult with a structural engineer or concreting professional to determine the appropriate type and size of reinforcement for your specific project. Factors to consider include the anticipated weight of the shed and its contents, the potential for soil movement, and the required load-bearing capacity of the slab. For example, a small garden shed might only require steel mesh, while a large workshop or garage might need rebar reinforcement.
Correct Spacing and Overlap: Maximising Structural Integrity
Correct spacing and overlap of the reinforcement are essential for maximizing structural integrity. The spacing between the steel mesh or rebar determines how effectively the reinforcement distributes the load and prevents cracking. Follow the manufacturer’s recommendations or consult with an engineer to determine the appropriate spacing for your specific project. Overlap the edges of the steel mesh or rebar to ensure continuous reinforcement throughout the slab. The amount of overlap required will depend on the size and type of reinforcement, as well as the local building codes. Typically, a minimum overlap of 300mm is recommended. Use wire ties to secure the overlapping sections of reinforcement together. Proper spacing and overlap ensure that the reinforcement works effectively to strengthen the concrete and prevent cracking and failure. Neglecting this step can significantly reduce the slab’s load-bearing capacity and longevity.
Elevating the Reinforcement: Preventing Corrosion
Elevating the reinforcement is crucial for preventing corrosion and ensuring the long-term durability of the shed slab. When steel reinforcement comes into direct contact with the ground, it’s susceptible to moisture and chemicals that can cause it to rust and corrode. This corrosion can weaken the reinforcement and ultimately compromise the structural integrity of the slab. Use concrete spacers or chairs to elevate the reinforcement above the ground. These spacers should be made of a non-corrosive material, such as plastic or concrete. Place the spacers at regular intervals to ensure that the reinforcement is evenly supported. The height of the elevation will depend on the local building codes and the soil conditions, but typically a minimum of 50mm is recommended. Elevating the reinforcement creates a protective layer of concrete around the steel, preventing it from coming into direct contact with the ground and minimizing the risk of corrosion. Neglecting this step can significantly reduce the lifespan of the shed slab, particularly in areas with high soil moisture or corrosive soils, such as those found in some coastal regions. You might also consider options like epoxy-coated rebar for particularly corrosive environments, or if you plan on concrete repairs in the future.
Step 4: Concrete Pouring – Achieving a Smooth and Even Surface
Choosing the Right Concrete Mix: Strength and Durability Considerations
Selecting the appropriate concrete mix is critical for a long-lasting shed slab. The strength of concrete is measured in megapascals (MPa), and the required MPa depends on the shed’s intended use and the loads it will bear. For a standard garden shed, a 20-25 MPa mix is generally sufficient. However, if you plan to store heavy equipment or machinery, a higher strength mix (32 MPa or more) is recommended. Durability is also key, particularly in areas with harsh weather conditions. Consider using a mix with additives to resist freeze-thaw cycles or chemical exposure. The water-to-cement ratio is a crucial factor affecting both strength and durability; a lower ratio generally results in stronger, more durable concrete, but it also makes the mix harder to work with. Consulting with your concrete supplier to determine the most suitable mix for your specific needs and local conditions is highly advisable. For example, in the Blue Mountains, a mix resistant to frost damage is beneficial.
Proper Pouring Techniques: Avoiding Segregation and Voids
Proper pouring techniques are essential to prevent segregation (separation of aggregate from the cement paste) and the formation of voids. Concrete should be poured in layers of approximately 100-150mm, ensuring each layer is thoroughly consolidated before the next is poured. Consolidation involves removing trapped air and compacting the concrete around the reinforcement. This can be achieved using a concrete vibrator, which should be inserted vertically into the concrete at regular intervals, being careful not to over-vibrate which can cause segregation. When pouring, avoid dropping concrete from excessive heights, as this can also lead to segregation. If pouring from a concrete truck, use a chute to control the flow and minimize the drop height. Pay particular attention to corners and edges, ensuring they are fully filled and compacted. Taking the time to pour correctly will significantly improve the slab’s strength and appearance.
Using Laser Screed Technology: Achieving Precision Levelling
Laser screed technology offers a significant advantage for achieving precision levelling of concrete slabs, especially for larger sheds. A laser screed uses a rotating laser transmitter to create a level plane and a receiver mounted on the screed to automatically adjust the screed height. This ensures the concrete is poured to the correct level and slope across the entire slab area, with minimal manual adjustment. Laser screeds can significantly reduce labour costs and pouring time, while simultaneously improving the accuracy and flatness of the finished surface. While the initial investment in hiring a laser screed may be higher, the resulting quality and efficiency can justify the cost, particularly for slabs larger than 50 square metres. Even if a laser screed isn’t used, ensuring accurate levels with manual screeding techniques is paramount. Check out this page covering the importance of a strong concrete foundation.
Step 5: Curing – Ensuring Maximum Concrete Strength
The Importance of Curing: Preventing Cracking and Shrinkage
Curing is the process of maintaining adequate moisture and temperature in concrete after it has been placed and finished, allowing it to hydrate properly and gain strength. Insufficient curing can lead to rapid moisture loss, causing the concrete to shrink and crack. Proper curing is essential for achieving the concrete’s designed strength and durability. Concrete gains most of its strength in the first 7 days of curing, making this period critical. Without proper curing, the surface can become weak and prone to dusting or scaling. It is estimated that inadequate curing can reduce the concrete’s strength by as much as 50%. In Penrith, where summer temperatures can be high, the need for effective curing is heightened.
Curing Methods: Water Curing, Membrane Curing, and More
Several curing methods are available, each with its advantages and disadvantages. Water curing involves keeping the concrete surface continuously wet, either by ponding water on the slab, using soaker hoses, or applying wet burlap or cotton mats. This is one of the most effective methods, as it provides constant moisture and helps to regulate the concrete’s temperature. Membrane curing involves applying a liquid curing compound to the concrete surface, which forms an impermeable membrane that prevents moisture from escaping. This is a convenient method, especially for large areas, but it’s important to choose a high-quality compound that provides adequate moisture retention. Other methods include steam curing (used primarily in precast concrete plants) and plastic sheeting, which can help retain moisture but can also lead to uneven curing if not properly sealed. The choice of curing method depends on factors such as the size of the slab, the ambient weather conditions, and the availability of resources.
Monitoring Temperature and Humidity: Optimising Curing Conditions
Monitoring temperature and humidity during the curing process is essential to ensure optimal hydration and strength development. Concrete should be kept within a temperature range of 10-30°C for best results. In hot weather, measures should be taken to prevent the concrete from overheating, such as shading the slab or using cooling water. In cold weather, the concrete should be protected from freezing, as this can severely damage its structure. Humidity should be kept as high as possible to prevent moisture loss. This can be achieved by regularly wetting the surface or using a curing compound. Monitoring temperature and humidity levels can be done using simple thermometers and hygrometers. Consider the local climate; concrete work in the Central West will require different curing strategies compared to coastal regions.
Common Pitfalls to Avoid When Building a Shed Slab
Inadequate Site Preparation: Leading to Settlement Issues
One of the most common and costly mistakes is inadequate site preparation. If the soil beneath the slab is not properly compacted and leveled, it can lead to settlement issues, causing the slab to crack and become uneven over time. This is particularly critical on sloping sites or sites with unstable soil conditions. Before pouring concrete, the topsoil should be removed, and the subgrade should be compacted in layers using a plate compactor or roller. A layer of compacted gravel should then be added to provide a stable base and improve drainage. Failing to adequately prepare the site is a false economy, as the cost of repairing a cracked or settled slab will far outweigh the initial savings. As excavation experts will attest, proper preparation is fundamental to a lasting concrete structure.
Insufficient Reinforcement: Resulting in Cracking and Weakness
Insufficient reinforcement is another common pitfall that can lead to cracking and weakness in the shed slab. Reinforcement, typically in the form of steel mesh or rebar, helps to distribute loads and resist tensile stresses in the concrete. The amount and type of reinforcement required depends on the size of the slab, the intended use, and the soil conditions. A common mistake is using too little reinforcement or using reinforcement that is too light. As a general rule, a minimum of SL72 mesh (steel reinforcing mesh) is recommended for most shed slabs. For heavier loads or unstable soil conditions, SL82 or even rebar may be necessary. Ensure the reinforcement is properly supported and positioned within the concrete, typically in the middle of the slab thickness.
Poor Curing Practices: Compromising Concrete Strength
As previously discussed, poor curing practices can significantly compromise the strength and durability of the concrete slab. Neglecting to cure the concrete properly can lead to rapid moisture loss, causing the concrete to shrink and crack. It is essential to choose an appropriate curing method and to implement it consistently for at least seven days after pouring. Common mistakes include not starting the curing process soon enough, not applying enough water, or using a low-quality curing compound. Remember that curing is not an optional step; it is a crucial part of the concrete placement process.
Alternatives to a Traditional Concrete Shed Slab (and When to Choose Them)
Gravel Pads: Cost-Effective but Less Durable
Gravel pads offer a cost-effective alternative to concrete slabs, particularly for small, lightweight sheds that don’t require a perfectly level or permanent foundation. A gravel pad consists of a layer of compacted gravel, typically 100-150mm thick, that provides a stable base for the shed. Gravel pads are easy to install and allow for good drainage, preventing water from pooling around the base of the shed. However, they are less durable than concrete slabs and may settle or shift over time, especially in areas with heavy rainfall or unstable soil. Gravel pads are best suited for temporary or semi-permanent sheds used for storing lightweight items. They are not recommended for sheds that will house heavy equipment or machinery.
Timber Platforms: Suitable for Lightweight Sheds
Timber platforms provide another alternative to concrete slabs for lightweight sheds. A timber platform consists of a wooden frame supported by posts or piers, creating a raised floor for the shed. Timber platforms are relatively easy to construct and can be adapted to sloping sites. However, they are susceptible to rot and insect damage, particularly if not properly treated. Timber platforms are best suited for small, lightweight sheds used for storing garden tools or other lightweight items. Regular maintenance is required to prevent rot and insect infestation. Consider the fire risk associated with timber in bushfire prone areas; a concrete slab offers superior fire resistance.
Pre-fabricated Shed Bases: Quick Installation but Limited Customisation
Pre-fabricated shed bases offer a quick and convenient alternative to traditional concrete slabs. These bases are typically made from plastic or composite materials and come in various sizes and shapes. They are easy to install and require minimal site preparation. However, pre-fabricated shed bases are generally less durable and less customisable than concrete slabs. They may not be suitable for heavy loads or uneven terrain. Pre-fabricated shed bases are best suited for small, lightweight sheds on relatively level sites, where ease of installation is a priority over long-term durability. Ensure the chosen base is rated to support the intended load of the shed and its contents. While easy to install, the long-term performance may not match that of a properly installed concrete slab.
Shed Slab Checklist: Key Considerations Before You Start
Site Assessment: Soil Type, Drainage, and Accessibility
Before pouring any concrete, a thorough site assessment is crucial. Soil type is a primary factor; reactive clay soils, common in some parts of the Blue Mountains and Central West, require careful consideration to prevent slab cracking due to expansion and contraction. We evaluate the soil’s bearing capacity to ensure it can support the shed’s weight. Poor drainage can lead to water pooling under the slab, causing instability and potential frost heave in colder areas. Proper drainage solutions, such as installing drainage pipes or creating a slight slope away from the shed, should be incorporated into the design. Finally, accessibility for machinery and materials significantly impacts the cost and complexity of the project. Limited access may necessitate the use of smaller equipment or manual labour, potentially increasing both time and expense. For example, a narrow driveway or significant vegetation may present access challenges that need addressing early on.
Shed Size and Weight: Determining Slab Thickness and Reinforcement
The dimensions and weight of your shed directly influence the necessary slab thickness and reinforcement. A small garden shed might only require a 100mm thick slab with light mesh reinforcement, while a larger workshop or storage shed will necessitate a thicker slab (125mm to 150mm or more) with increased reinforcement, such as rebar. Calculate the total weight of the shed and its contents to ensure the slab can handle the load. Consult with a structural engineer or experienced concreter to determine the optimal slab thickness and reinforcement strategy based on your specific needs and local building codes. Over-engineering the slab adds unnecessary cost, while under-engineering can lead to premature failure. A useful online calculator, such as those provided by engineering resources, can give a starting point for estimating the required concrete volume and reinforcement.
Permits and Regulations: Complying with Local Council Requirements
Before commencing any work, it is essential to check with your local council regarding permits and regulations. Most councils, including those in Penrith, the Blue Mountains, and the Central West, have specific requirements for shed slabs, including setbacks from property lines, allowable sizes, and drainage considerations. Failure to obtain the necessary permits can result in fines and potential legal issues. The NSW Planning Portal is a good starting point for researching local regulations. Understand the council’s requirements for inspections during and after construction. Ensure your concreter is aware of and complies with all applicable regulations. This includes environmental regulations related to concrete washout and erosion control. Obtaining the correct permits and adhering to regulations avoids costly delays and ensures your shed slab is compliant.
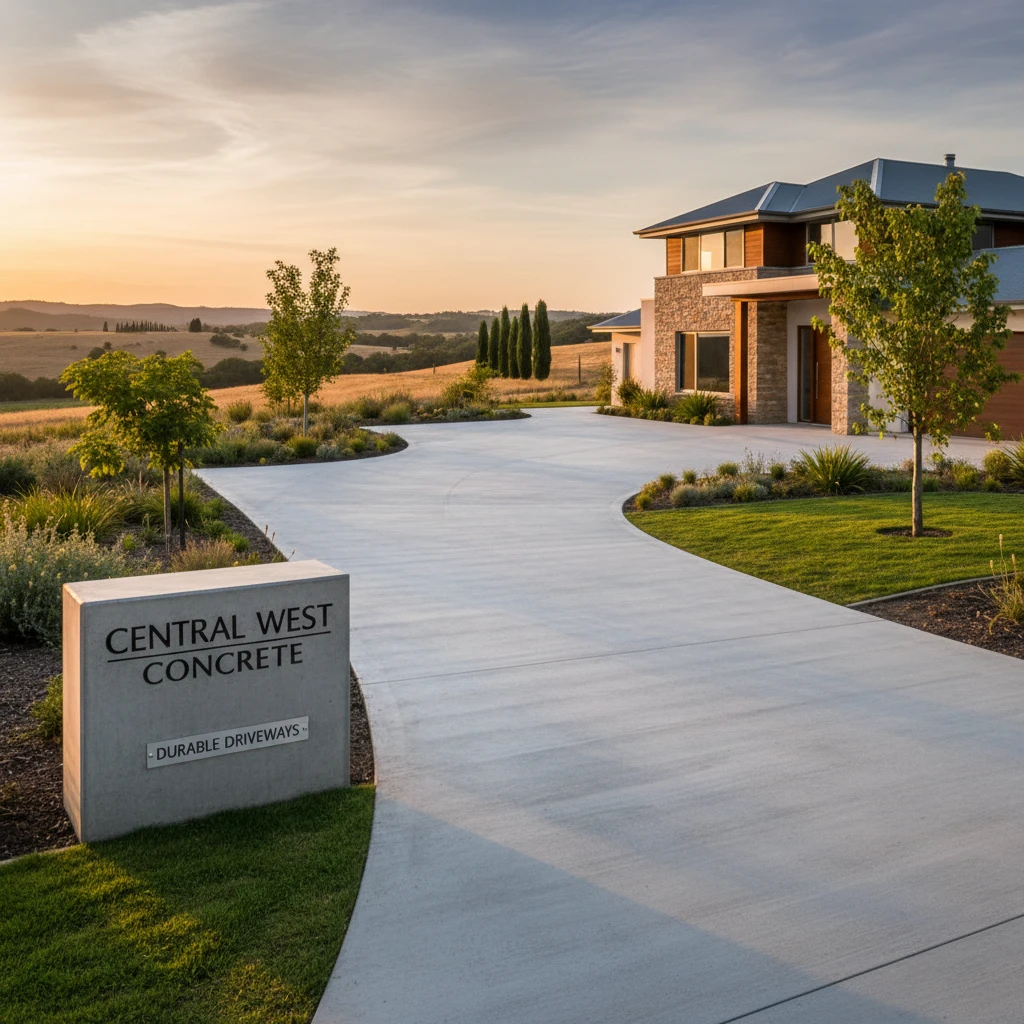
Why Choose Laser Concrete for Your Shed Slab Project in Penrith, Blue Mountains & Central West?
Experience with Challenging Terrains: Slopes, Rocks, and Tight Access Specialists
Laser Concrete specialises in shed slab installations on challenging terrains, common throughout Penrith, the Blue Mountains, and Central West. We have extensive experience working on sloped blocks, rocky ground, and sites with limited access. Our team possesses the skills and equipment necessary to overcome these obstacles, ensuring a level and stable foundation for your shed. We utilise specialised excavation techniques and equipment, such as mini excavators and bobcats, to navigate tight spaces and minimise disturbance to the surrounding landscape. Our proficiency in managing complex sites ensures that even the most difficult projects are completed efficiently and to the highest standards. This expertise is especially valuable if you’re located in areas like the Blue Mountains where steep blocks are typical.
Commitment to Quality Workmanship: Durable and Long-Lasting Results
At Laser Concrete, we are committed to providing quality workmanship that results in durable and long-lasting shed slabs. We use only high-quality materials and employ experienced concreters who take pride in their work. From proper site preparation and accurate formwork to precise concrete placement and finishing, we pay attention to every detail. Our meticulous approach ensures that your shed slab is built to withstand the test of time and provide a solid foundation for your shed for years to come. We stand behind our work with a commitment to customer satisfaction. We understand that a shed slab is a long-term investment, and we aim to deliver a product that meets and exceeds your expectations.
Local Expertise: Understanding the Unique Needs of the Region
As a local business, Laser Concrete understands the unique needs of the Penrith, Blue Mountains, and Central West regions. We are familiar with the local soil conditions, climate, and building regulations. This local expertise allows us to provide tailored solutions that are best suited for your specific site and requirements. We are also experienced in working with local councils and obtaining the necessary permits for shed slab installations. Choosing a local concreter like Laser Concrete ensures that you are working with a team that is knowledgeable, reliable, and committed to serving the community. We’re not just pouring concrete; we’re building relationships and contributing to the long-term success of our region. Having local knowledge allows us to adapt to changing conditions quickly.
Case Studies: Examples of Successful Shed Slab Installations
Shed Slab for a Rural Workshop in the Blue Mountains
Example: A homeowner in Blackheath, Blue Mountains, needed a shed slab for a new workshop. The site had a significant slope and limited access. Laser Concrete used a mini excavator to create a level building pad and installed retaining walls to prevent soil erosion. The slab was reinforced with rebar to accommodate heavy machinery. The client reported improved property value and workability due to the level surface.
Equipment Slab for a Farm in the Central West
Example: A farmer near Mudgee in the Central West required a large concrete slab to store farm equipment. The site was prone to flooding, so Laser Concrete installed a drainage system to divert water away from the slab. The slab was poured with a higher concrete strength to withstand the weight of heavy machinery, as the Central West region experiences unique challenges. The farmer noted a significant reduction in equipment maintenance due to the stable and dry storage area.
Shed Slab on a Sloping Block in Penrith
Example: A Penrith resident needed a shed slab on a block with a steep slope. Excavation was necessary, and reinforced retaining walls were built to provide support. Laser Concrete poured a stepped slab to accommodate the slope and ensure a level surface for the shed. The homeowner gained valuable storage space and improved the overall aesthetic of their property. The project’s success hinged on precision excavation and concrete forming to manage the challenging gradient.
Ready to Get Started? Contact Us for a Quote on Your Shed Slab Project
Free Consultation and Site Assessment
We offer a free consultation and site assessment to discuss your shed slab project and determine the best solution for your needs. Our experienced team will visit your property, assess the site conditions, and provide expert advice. We will answer any questions you may have and provide a detailed explanation of the process involved. This consultation allows us to understand your specific requirements and tailor our services accordingly. We believe in open communication and transparency from the outset.
Competitive Pricing and Transparent Quotes
Laser Concrete provides competitive pricing and transparent quotes for all shed slab projects. Our quotes include a detailed breakdown of all costs involved, so you know exactly what you are paying for. We do not believe in hidden fees or unexpected charges. We strive to provide the best value for your money, without compromising on quality or workmanship. Get a free quote and compare us to other providers in the area.
Dedicated Project Management from Start to Finish
We provide dedicated project management from start to finish, ensuring a smooth and stress-free experience for our clients. Our project managers will oversee all aspects of the project, from initial consultation to final completion. They will coordinate with our team of concreters, manage the schedule, and ensure that the project is completed on time and within budget. You can rely on us to handle all the details, so you can focus on other priorities.
With careful planning and execution, your shed slab project can be a success. Contact Laser Concrete today for a free consultation and let us help you build a solid foundation.
For more information on concrete mixes and their applications, visit the Portland Cement Association, a leading resource for concrete knowledge.
You can also find detailed information on building codes and standards in Australia on the Australian Building Codes Board (ABCB) website.