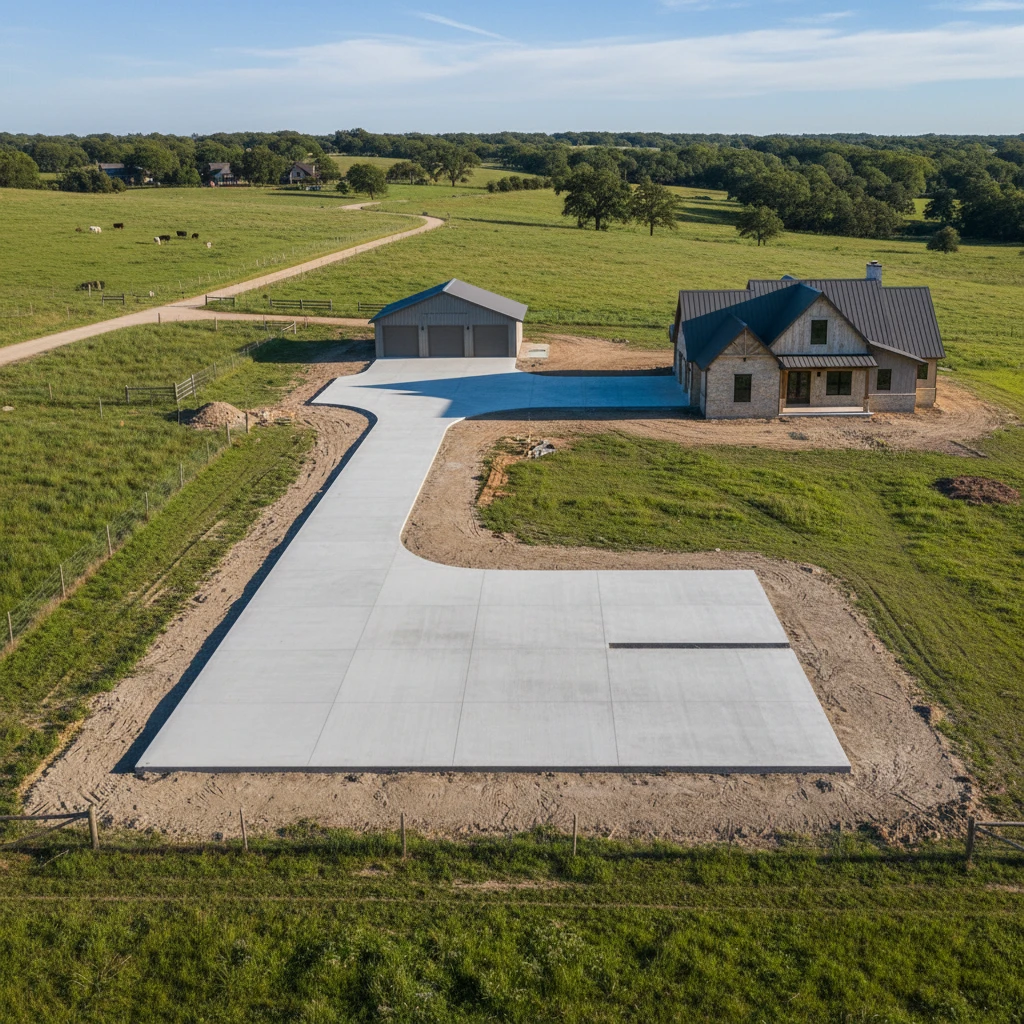
Creating safe and durable concrete footpaths on sloped sites demands a different level of expertise compared to flat ground. The challenges posed by gravity, drainage, and accessibility require careful planning, precise excavation, and a concrete mix design tailored to the specific conditions. A well-executed footpath not only provides access but also enhances the property’s value and aesthetic appeal, especially here in the Blue Mountains where we often deal with sloping blocks.
This article delves into the critical aspects of constructing quality concrete footpaths on sloped sites, covering everything from initial design considerations to the final concrete mix. We’ll explore the unique challenges these projects present, and outline the best practices for ensuring long-lasting stability and safety.
Why Sloped Sites Need Special Footpath Considerations
The challenges of erosion and drainage on inclines
Sloped sites are inherently vulnerable to erosion. Water runoff accelerates on inclines, potentially undermining the footpath base and leading to cracks or even complete failure. Effective drainage is paramount. This involves creating a path gradient that directs water away from structures and preventing ponding. Consider incorporating features like swales, French drains, or culverts to manage water flow effectively. A common pitfall is underestimating the volume of water during heavy rainfall, leading to inadequate drainage capacity. For instance, a seemingly minor slope can channel a surprising amount of water during a storm. Regular inspection and maintenance of drainage systems are crucial to prevent long-term damage. Furthermore, the soil type plays a vital role. Clay soils, for example, retain more water than sandy soils, increasing the risk of erosion and frost heave. Therefore, a comprehensive site assessment, including soil analysis and hydrological studies, is essential before commencing any construction work. Central West specialists understand this point well.
Accessibility requirements for sloping paths (and when they apply)
Accessibility is a critical consideration, particularly for public spaces or properties intended for use by individuals with mobility challenges. Australian Standards AS 1428 outline specific requirements for path gradients, width, and surface materials to ensure accessibility for wheelchair users and others with disabilities. While these standards may not be mandatory for all residential properties, adhering to them whenever feasible promotes inclusivity and can significantly enhance the usability of the footpath. Key considerations include: maximum gradient (typically 1:20 or less), minimum width (at least 1 metre for single users, 1.5 metres for two), and slip-resistant surfaces. Rest areas with level surfaces should be incorporated at regular intervals along steeper paths. Failing to meet these standards can result in restricted access and potential liability issues. Always consult local building codes and accessibility guidelines to determine the specific requirements for your project. If you are working on a commercial or public project, it’s advisable to engage an accessibility consultant to ensure full compliance. For a home renovation, future-proofing by including gentle inclines will add value and convenience. You can find details on accessibility guidelines on the Web Content Accessibility Guidelines (WCAG) site.
Long-term stability and safety implications
The long-term stability of a footpath on a slope directly impacts its safety. A poorly designed or constructed path can become a hazard due to subsidence, cracking, or uneven surfaces. Addressing soil stability is key to preventing these issues. This might involve soil compaction, reinforcement with geogrids, or the construction of retaining walls. Regular maintenance, including crack sealing and surface repairs, is essential to prolong the lifespan of the footpath and maintain a safe walking surface. Ignoring minor cracks can lead to more significant structural damage over time, especially during freeze-thaw cycles. Selecting durable, high-quality materials is a worthwhile investment in long-term safety and reduces the need for frequent repairs. A stable base is critical; without it, even the best concrete mix will eventually fail. Consider the impact of tree roots on the footpath’s foundation; root barriers may be necessary to prevent future damage. Ignoring these implications can lead to costly repairs and potential injuries. For durable solutions, expert concreters understand the importance of long-term planning.
Planning Your Footpath: Key Design Elements for Slopes

Determining the optimal path gradient and step spacing
The gradient of the footpath is perhaps the most crucial design element on a sloped site. Steeper gradients increase the risk of slips and falls, while excessively gentle gradients may require a much longer path, impacting the overall design and potentially increasing construction costs. A gradient of 1:20 (5%) is generally considered the maximum acceptable slope for accessible paths, while gentler slopes of 1:30 or 1:40 are preferable where possible. When steps are necessary, consistent riser heights and tread depths are crucial for safety. A common rule of thumb is to use the 2R + T = 600-650mm formula, where R is the riser height and T is the tread depth. This formula helps ensure a comfortable and consistent stepping rhythm. Varying step heights can easily lead to stumbles. Consider incorporating landings or level areas at regular intervals along the path, especially on steeper slopes, to provide rest areas and reduce fatigue. Accurate site surveying and careful planning are essential to determine the optimal path gradient and step spacing, taking into account both accessibility requirements and the natural contours of the land. Professional site preparation sets the foundation for success.
Choosing the right width for comfortable access
The width of the footpath directly impacts its usability and comfort. A minimum width of 1 metre is generally recommended for single users, while a width of 1.5 metres is preferable for two people to comfortably walk side-by-side. Consider the intended use of the footpath and the potential volume of pedestrian traffic when determining the appropriate width. Wider paths may be necessary in areas with high foot traffic or where accessibility for wheelchairs or other mobility devices is a priority. It’s important to consider the placement of objects such as handrails, which may reduce the usable path width. Additionally, consider the overall aesthetic of the landscape. A path that is too wide can appear disproportionate to the surrounding environment, while a path that is too narrow can feel cramped and uncomfortable. Thoughtful planning ensures the footpath is both functional and visually appealing. Integrating the path seamlessly into the landscape enhances the property’s overall value. Remember that the path should not only be adequate for current needs, but also adaptable to potential future uses.
Integrating handrails and lighting for safety
Handrails are essential safety features on sloped footpaths, particularly on steeper sections or where there is a risk of falls. Handrails should be sturdy, easy to grip, and installed at a comfortable height (typically 900mm above the path surface). Consider using materials that are durable and weather-resistant, such as galvanised steel or powder-coated aluminium. Lighting is equally important, especially for paths that will be used at night or in low-light conditions. Adequate lighting improves visibility, reduces the risk of accidents, and enhances the overall safety and security of the property. Choose lighting fixtures that are energy-efficient and provide sufficient illumination without causing glare. Solar-powered lighting is an excellent option for reducing energy consumption and installation costs. Consider the placement of lighting fixtures to avoid creating shadows or blind spots. Motion-sensor lighting can be used to conserve energy and deter unwanted activity. Both handrails and lighting should be integrated seamlessly into the overall design of the footpath to enhance its aesthetic appeal while maximizing its safety and functionality. A well-lit and accessible pathway adds significant value to a property. If you have safety concerns, invest in a high-quality concrete footpath.
Excavation Techniques for Uneven Terrain
Preparing the site: clearing vegetation and topsoil removal
Proper site preparation is crucial for the long-term stability of any concrete footpath, especially on uneven terrain. The first step involves clearing all vegetation, including trees, shrubs, and grass, from the path’s alignment. Remove any roots that could potentially interfere with the foundation. Topsoil, which is rich in organic matter, should also be removed, as it is unstable and unsuitable for supporting concrete. The depth of topsoil removal will vary depending on the site conditions, but typically a depth of 100-200mm is sufficient. Use appropriate machinery, such as excavators or graders, to efficiently remove vegetation and topsoil. Take care to avoid damaging surrounding vegetation or structures. Consider the environmental impact of vegetation removal and implement measures to minimise soil erosion. Stockpile the removed topsoil for later use in landscaping or other projects. A well-prepared site ensures a solid foundation for the concrete footpath and prevents future problems caused by settling or instability. This initial step is often underestimated, but it is fundamental to the success of the entire project. Neglecting proper clearing and topsoil removal can lead to costly repairs and premature failure of the footpath.
Cut and fill: balancing excavation and backfilling
On sloped sites, the “cut and fill” technique is often employed to create a level or gently sloping base for the footpath. This involves excavating soil from higher areas (“cut”) and using it to fill in lower areas (“fill”). The goal is to balance the amount of excavation and backfilling to minimise the need for importing or exporting soil. Careful planning is essential to ensure that the cut and fill operations are properly executed. Use surveying equipment to accurately determine the required excavation depths and fill heights. Compact the fill material in layers to ensure stability and prevent settling. The type of fill material used is also important; granular materials, such as gravel or crushed rock, are generally preferred for their drainage properties and stability. Avoid using organic materials or unsuitable soils as fill. Proper compaction is critical; use a plate compactor or roller to achieve the desired density. Over-compaction can also be detrimental, so it’s important to monitor the compaction process carefully. Failing to properly balance cut and fill can result in uneven surfaces, drainage problems, and structural instability. Accurately calculating cut and fill volumes will also help in budgeting for material handling and disposal.
Managing soil erosion during excavation
Excavation activities can significantly increase the risk of soil erosion, especially on sloped sites. Implementing effective erosion control measures is essential to protect the surrounding environment and prevent sediment from entering waterways. Several techniques can be used to manage soil erosion during excavation. These include: installing silt fences to trap sediment runoff, using erosion control blankets to stabilise exposed soil surfaces, and creating temporary diversion channels to redirect water flow away from the excavation area. Minimise the amount of exposed soil by phasing the excavation work and stabilising exposed areas as quickly as possible. Avoid excavating during periods of heavy rainfall. Regularly inspect erosion control measures and maintain them as needed. Consider using hydroseeding to establish vegetation on exposed soil surfaces. Proper erosion control is not only environmentally responsible but also helps to prevent costly fines and delays. Compliance with local environmental regulations is essential. Effective erosion control is a sign of responsible construction practices and protects the surrounding ecosystem. Failure to manage soil erosion can lead to significant environmental damage and legal repercussions. You can learn more about erosion control techniques on the Environmental Protection Agency (EPA) website.
Concrete Mix Design: Strength and Durability for Sloping Paths
Importance of correct water-cement ratio
The water-cement ratio (w/c ratio) is arguably the most critical factor affecting the strength and durability of concrete. It represents the ratio of the weight of water to the weight of cement used in the mix. A lower w/c ratio generally results in stronger, more durable concrete, but it also reduces workability, making the mix more difficult to place and finish. Conversely, a higher w/c ratio increases workability but weakens the concrete and makes it more susceptible to cracking and deterioration. For footpaths, a w/c ratio between 0.45 and 0.55 is typically recommended. Precise measurement of water and cement is crucial to achieving the desired w/c ratio. Use a calibrated water meter and weigh the cement accurately. Avoid adding extra water to the mix to improve workability, as this will compromise the concrete’s strength. Consider using admixtures, such as plasticisers or superplasticisers, to improve workability without increasing the w/c ratio. Proper curing is also essential to ensure that the concrete achieves its full strength potential. Maintaining the correct w/c ratio is the foundation of durable concrete. Ignoring this principle will inevitably lead to premature failure, requiring costly repairs or replacements.
Selecting appropriate aggregate size and type
The aggregate constitutes the bulk of the concrete mix and significantly influences its strength, workability, and durability. Aggregate is categorised into fine aggregate (sand) and coarse aggregate (gravel or crushed stone). The maximum aggregate size should be appropriate for the thickness of the footpath and the spacing of any reinforcing steel. Generally, a maximum aggregate size of 20mm is suitable for footpaths. The aggregate should be well-graded, meaning that it contains a range of particle sizes, to maximise density and minimise voids. Use clean, well-graded aggregate that is free from organic matter, clay, or other contaminants. The type of aggregate also affects the concrete’s performance. For example, crushed stone provides better interlock than rounded gravel, resulting in higher strength. Consider using aggregates that are resistant to freeze-thaw damage, especially in colder climates. Poorly selected or contaminated aggregates can lead to weak, porous concrete that is susceptible to cracking and deterioration. Always source aggregates from reputable suppliers and ensure that they meet relevant Australian Standards. Choosing appropriate aggregate contributes to the long-term durability and performance of the concrete footpath. Investing in quality materials is an investment in longevity.
Admixtures to enhance workability and strength
Admixtures are chemical compounds added to the concrete mix to modify its properties and improve its performance. Several types of admixtures can be used to enhance the workability and strength of concrete for sloping paths. Plasticisers and superplasticisers are used to improve workability without increasing the water content, allowing for easier placement and finishing. Air-entraining agents create microscopic air bubbles in the concrete, which improve its resistance to freeze-thaw damage. Retarders are used to slow down the setting time of the concrete, which can be beneficial in hot weather or when transporting concrete over long distances. Accelerators are used to speed up the setting time of the concrete, which can be useful in cold weather or when rapid strength gain is required. Consider using fibre reinforcement to improve the concrete’s resistance to cracking. Carefully select admixtures based on the specific requirements of the project and the prevailing site conditions. Always follow the manufacturer’s instructions when using admixtures. Overdosing or using incompatible admixtures can have detrimental effects on the concrete’s performance. Using admixtures strategically can significantly improve the workability, strength, and durability of concrete footpaths, especially in challenging environments. Expert concreters understand that admixtures aren’t magic, but when used correctly, they add value.
Formwork and Reinforcement: Ensuring Structural Integrity
Building sturdy formwork that can withstand concrete pressure on slopes
Constructing formwork on a slope requires meticulous attention to detail to ensure it can contain the immense pressure exerted by wet concrete. The formwork acts as a mould, shaping the concrete as it cures, and any weakness can lead to costly and dangerous collapses. Start by accurately calculating the hydrostatic pressure exerted by the concrete, which increases with depth. This calculation will inform the selection of appropriate timber or steel for the formwork, as well as the spacing of supports. For example, a footpath section with a 1-metre vertical rise over a 3-metre run will require significantly stronger formwork than a flat section of the same dimensions.
Employing bracing and anchoring techniques specific to sloped terrain is essential. This may include using stakes driven deep into the ground, tied back to the formwork with wire or timber supports. The spacing of these supports should be closer than on level ground, especially at the lower end of the slope where the concrete pressure is greatest. Before pouring any concrete, thoroughly inspect the formwork for any signs of weakness or instability, and rectify them immediately. The quality of the formwork directly impacts the structural integrity and aesthetic appeal of the finished footpath. For more complex sloping sites, it may be necessary to consult with a structural engineer to ensure the formwork design is adequate.
Using steel reinforcement to prevent cracking
Steel reinforcement, typically in the form of rebar or mesh, is crucial for preventing cracking in concrete footpaths, particularly on sloped surfaces that are subject to increased stress from gravity and soil movement. Reinforcement works by distributing loads and tensile stresses throughout the concrete, preventing localised stress concentrations that can lead to cracks. The type and amount of reinforcement required will depend on several factors, including the footpath’s dimensions, the soil conditions, the expected traffic load, and the slope’s steepness.
Generally, a grid of rebar or wire mesh is placed within the concrete slab, ensuring adequate overlap at joints. For footpaths on steep slopes, consider using thicker rebar or a closer grid spacing to provide additional strength. The reinforcement should be properly positioned within the formwork before pouring the concrete, typically suspended on chairs or supports to ensure it remains in the correct location during the pour. A good rule of thumb is to aim for at least 50mm of concrete cover over the reinforcement to protect it from corrosion. In areas prone to freeze-thaw cycles, using epoxy-coated rebar can further enhance the durability of the concrete. Always consult with engineering specifications appropriate for your region, such as those referenced in Australian Standards like AS 3600, for specific reinforcement requirements. If you are considering additional support for heavy loads, consider using a shed slab expert.
Proper placement of expansion joints
Expansion joints are deliberately created gaps in the concrete footpath that allow it to expand and contract with temperature changes, preventing the buildup of stress that can lead to cracking. On sloped surfaces, proper placement of expansion joints is even more critical, as the slope can exacerbate the effects of thermal expansion and contraction. Expansion joints should be placed at regular intervals along the length of the footpath, typically every 3 to 6 metres, depending on the climate and concrete mix. They should also be located at points where the footpath abuts other structures, such as buildings or walls.
The width of the expansion joint should be sufficient to accommodate the expected amount of movement. Typically, a gap of 10-20mm is adequate. The joint should be filled with a flexible, weather-resistant sealant to prevent water and debris from entering. On slopes, consider using stepped or staggered expansion joints to prevent tripping hazards. These joints feature a slight vertical offset, allowing for differential movement between adjacent sections of the footpath without creating a sharp edge. Ensure the subgrade beneath the expansion joints is properly compacted and level to prevent uneven settling. Properly installed expansion joints are a small investment that can significantly extend the lifespan of a concrete footpath, especially in areas with extreme temperature variations. For example, in the Blue Mountains, where temperatures can fluctuate dramatically, expansion joints are essential for preventing cracking and maintaining the footpath’s integrity. If you are worried about the integrity of your concrete, look into concrete repair solutions.
Concrete Pouring and Finishing Techniques for Sloped Surfaces
Controlling concrete slump for even distribution
Concrete slump is a measure of its consistency and workability, and controlling it is essential for achieving even distribution and preventing segregation on sloped surfaces. Slump is measured by filling a cone-shaped mould with concrete, inverting the cone, and measuring how much the concrete slumps or drops down. A slump that is too high (too wet) will cause the concrete to flow excessively, leading to segregation of the aggregate and cement paste. A slump that is too low (too dry) will make the concrete difficult to work with and may result in voids and honeycombing.
For sloped footpaths, a medium slump is generally recommended, typically between 75mm and 100mm. This provides sufficient workability to allow the concrete to be placed and finished easily, without being too fluid. The slump should be consistent throughout the pour, so it’s essential to monitor it regularly using a slump cone. If the slump starts to vary, adjust the water content of the concrete mix accordingly. When pouring concrete on a slope, start at the bottom and work your way up, allowing gravity to assist with the distribution. Use a vibrator to consolidate the concrete and remove any air pockets, but be careful not to over-vibrate, as this can also lead to segregation. Consider using a concrete mix specifically designed for sloped applications, which may contain additives to improve its workability and prevent slump loss. Working with expert Central West concrete specialists can also ensure a consistent mix.
Achieving a non-slip surface: broom finish and aggregate exposure
A non-slip surface is crucial for safety on sloped footpaths, especially in wet or icy conditions. The two most common methods for achieving a non-slip surface are a broom finish and aggregate exposure. A broom finish involves dragging a stiff-bristled broom across the surface of the freshly poured concrete to create a textured pattern. The direction of the broom strokes should be perpendicular to the direction of travel to provide maximum grip. The depth and coarseness of the broom finish can be adjusted to suit the specific requirements of the site and the desired aesthetic.
Aggregate exposure involves removing the surface layer of cement paste to reveal the underlying aggregate. This can be achieved through various methods, such as washing, brushing, or using a chemical retarder. The exposed aggregate provides a naturally textured surface with excellent slip resistance. The type and size of aggregate used can also be selected to achieve the desired aesthetic and performance characteristics. For example, using larger, more angular aggregate will result in a rougher, more slip-resistant surface. Before applying either finish, ensure the concrete surface is properly floated and levelled. Practice on a small, inconspicuous area to determine the optimal technique and timing for achieving the desired result. A well-executed non-slip finish significantly reduces the risk of slips and falls, making the footpath safer for all users.
Curing methods to prevent cracking
Curing is the process of maintaining adequate moisture and temperature in the concrete after it has been poured, allowing it to hydrate properly and gain strength. Proper curing is essential for preventing cracking, especially on sloped surfaces where the concrete is more susceptible to drying shrinkage. There are several methods for curing concrete, including water curing, membrane curing, and steam curing. Water curing involves keeping the concrete surface continuously wet for a period of at least seven days. This can be achieved by ponding water on the surface, spraying it with sprinklers, or covering it with wet burlap or sand.
Membrane curing involves applying a liquid curing compound to the concrete surface, which forms a waterproof membrane that prevents moisture from evaporating. Steam curing involves exposing the concrete to steam in a controlled environment, which accelerates the hydration process and increases its early strength. The choice of curing method will depend on the climate, the concrete mix, and the project schedule. In hot, dry weather, water curing is generally the most effective method, as it provides the most consistent moisture. In cooler weather, membrane curing may be sufficient. Regardless of the method used, it’s crucial to start curing the concrete as soon as possible after it has been finished. Delaying the curing process can significantly increase the risk of cracking. Consider using a curing compound that is specifically designed for use on sloped surfaces, which may contain additives to improve its adhesion and prevent it from running off. Consistent curing practices can greatly reduce the need for concrete repairs later on.
Drainage Solutions: Preventing Water Damage on Sloped Footpaths
Installing adequate drainage channels
Effective drainage is paramount for the longevity of sloped footpaths. Without proper drainage, water can accumulate on the surface or infiltrate the subgrade, leading to erosion, cracking, and eventual failure of the footpath. Installing adequate drainage channels is the first line of defence against water damage. These channels should be strategically located to intercept surface runoff and direct it away from the footpath. Typically, drainage channels are placed along the uphill side of the footpath to prevent water from flowing across the surface. They can also be placed along the downhill side to collect any water that does manage to reach the edge of the footpath.
The size and capacity of the drainage channels should be determined based on the expected rainfall intensity and the slope of the surrounding terrain. A general rule of thumb is to design the channels to handle the runoff from a 1-in-10-year storm event. The channels should be sloped towards an outlet, such as a storm drain or a natural drainage course. The slope should be sufficient to ensure that water flows freely and does not stagnate. Regularly inspect and maintain the drainage channels to remove any debris or obstructions that could impede the flow of water. Consider using grated drainage channels to prevent leaves and other debris from entering and clogging the system. Proper excavation is key in this process and is the foundation for any concrete work, as described by excavation experts.
Choosing appropriate drainage materials
The selection of appropriate drainage materials is crucial for the effectiveness and durability of the drainage system. Several materials can be used for drainage channels, including concrete, precast concrete, plastic, and metal. Concrete channels are durable and can be easily integrated into the footpath design. Precast concrete channels offer a more consistent quality and can be installed more quickly than cast-in-place concrete channels. Plastic channels are lightweight, corrosion-resistant, and easy to install. Metal channels are strong and durable, but can be susceptible to corrosion in certain environments.
The choice of material will depend on factors such as the budget, the aesthetic requirements, and the environmental conditions. Consider using permeable paving materials for the footpath surface itself to allow water to infiltrate directly into the subgrade. Permeable paving materials include porous concrete, permeable asphalt, and interlocking pavers with permeable joints. When selecting drainage materials, ensure they are compatible with the surrounding soil and vegetation. For example, avoid using materials that could leach harmful chemicals into the soil or damage nearby plants. A well-designed drainage system using appropriate materials will protect the footpath from water damage and extend its lifespan. Consider how the choice of materials may be affected by difficult access.
Ensuring proper slope for effective water runoff
The slope of the footpath itself is a critical factor in ensuring effective water runoff. The footpath should be designed with a slight cross-slope, typically 1-2%, to allow water to drain quickly and efficiently. The cross-slope should be consistent along the entire length of the footpath to prevent water from pooling in low spots. In areas with heavy rainfall, consider increasing the cross-slope to improve drainage capacity. The footpath should also be sloped towards the drainage channels to direct water away from the surface. The slope towards the drainage channels should be steeper than the cross-slope to ensure that water flows quickly and efficiently into the channels.
Avoid creating any dips or depressions in the footpath surface that could trap water. Ensure the subgrade beneath the footpath is properly compacted and graded to provide a stable and even base for the concrete. Consider using a laser level to accurately grade the subgrade and ensure that the footpath has the correct slope. Regularly inspect the footpath for any signs of ponding water and address any issues promptly. Proper slope and grading are essential for preventing water damage and maintaining the safety and usability of the footpath. Proper water runoff planning goes hand in hand with preparing your Penrith site for concrete.
Common Footpath Mistakes on Slopes and How to Avoid Them
Inadequate compaction leading to subsidence
Inadequate compaction of the subgrade is a common mistake that can lead to subsidence and cracking in concrete footpaths, especially on sloped surfaces. The subgrade is the layer of soil beneath the concrete, and it must be properly compacted to provide a stable and uniform base. If the subgrade is not adequately compacted, it can settle over time, causing the concrete to crack and subside. The amount of compaction required will depend on the type of soil, the slope of the terrain, and the expected traffic load. Generally, a compaction rate of at least 95% of the maximum dry density is recommended.
Use appropriate compaction equipment, such as a plate compactor or a roller, to compact the subgrade in layers. Each layer should be no more than 150mm thick. Ensure the subgrade is properly moisture-conditioned before compaction. Too much or too little moisture can reduce the effectiveness of the compaction process. Test the compaction rate regularly using a soil testing device to ensure it meets the required specifications. Pay particular attention to areas around underground utilities and drainage structures, as these areas are often prone to inadequate compaction. Proper compaction is a crucial step in ensuring the long-term stability and durability of the concrete footpath.
Insufficient drainage causing water pooling and damage
Insufficient drainage is another common mistake that can lead to water pooling, erosion, and damage to concrete footpaths on slopes. When water is allowed to accumulate on the surface or infiltrate the subgrade, it can weaken the concrete, erode the soil, and cause the footpath to crack and subside. Ensure adequate drainage channels are installed to intercept surface runoff and direct it away from the footpath. The drainage channels should be sized appropriately to handle the expected rainfall intensity. The footpath should be sloped to promote water runoff and prevent ponding. The subgrade should be properly graded to ensure that water flows freely towards the drainage channels.
Regularly inspect and maintain the drainage system to remove any debris or obstructions that could impede the flow of water. Consider using permeable paving materials to allow water to infiltrate directly into the subgrade. In areas with heavy rainfall or poor soil drainage, consider installing a subsurface drainage system to collect and remove excess water. Failure to address drainage issues can result in costly repairs and a shortened lifespan for the footpath. When dealing with concrete and excavation, it’s vital to understand the specific challenges posed by the location, just like understanding the challenges presented by excavation projects. For specific information about drainage requirements, consult local building codes.
Poorly designed steps creating tripping hazards
Poorly designed steps can create significant tripping hazards on sloped footpaths, leading to injuries and potential liability. Ensure that all steps have consistent rise and run dimensions. The rise is the vertical height of the step, and the run is the horizontal depth of the step. Inconsistent rise and run dimensions can throw off a person’s stride and increase the risk of tripping. A common recommendation is to aim for a rise of around 150mm and a run of around 300mm, but check local building codes for specific requirements. All steps should have a non-slip surface to provide adequate traction, especially in wet or icy conditions. Consider adding a contrasting colour to the edge of each step to improve visibility and make it easier for people to judge the depth.
Install handrails on both sides of the steps to provide additional support and stability. The handrails should be at a comfortable height and should extend beyond the top and bottom steps. Ensure that the steps are properly illuminated, especially at night. Poor lighting can make it difficult to see the steps and increase the risk of tripping. Regularly inspect the steps for any signs of damage or deterioration, such as cracks, loose treads, or uneven surfaces. Repair any issues promptly to prevent accidents. Adhering to accessibility guidelines, such as those outlined in the Disability Discrimination Act (DDA), is essential to ensure that the steps are safe and usable for people with disabilities. Carefully consider step design, especially on sloped sites. Example: A homeowner in Penrith installed steps on their sloped garden path. Initially, the steps were too steep and the treads too narrow, leading to several near-falls. After redesigning the steps with shallower rises and wider treads, and adding a sturdy handrail, the path became safe and accessible for all family members. Ignoring these factors can create hazardous conditions that undermine the entire project.
Maintaining Your Sloped Concrete Footpath for Longevity
Regular cleaning to prevent staining and algae growth
Regular cleaning is crucial to prevent the build-up of stains and algae, which can not only detract from the aesthetic appeal of your sloped concrete footpath but also create a slippery and hazardous surface. Aim to clean your footpath at least every three to six months, or more frequently in areas prone to moisture or shade. The cleaning process doesn’t require harsh chemicals; a stiff brush, some mild detergent, and water are usually sufficient. For stubborn stains or algae, consider using a pressure washer on a low setting, but be careful not to damage the concrete surface. Always test a small, inconspicuous area first. An often-overlooked benefit of regular cleaning is the early detection of minor issues like small cracks, allowing for prompt repair before they escalate into larger, more costly problems. Furthermore, ensure proper drainage around the footpath to minimise water pooling, which encourages algae growth. Decision criteria for cleaning frequency should include factors like local climate, the amount of shade the path receives, and the proximity to vegetation.
Sealing to protect against weathering and water damage
Sealing your sloped concrete footpath is a proactive measure that significantly extends its lifespan. A high-quality concrete sealer acts as a barrier against water penetration, preventing freeze-thaw damage, staining from spills, and the corrosive effects of de-icing salts in colder climates. Choose a sealer specifically designed for concrete footpaths and consider its slip resistance, especially on sloped surfaces. There are two main types of sealers: penetrating sealers, which soak into the concrete and provide protection from within, and topical sealers, which form a protective film on the surface. Penetrating sealers are generally preferred for footpaths as they don’t alter the appearance of the concrete and are less prone to chipping or peeling. Before applying a sealer, ensure the concrete is clean and dry. Reapply the sealer every two to three years, or as recommended by the manufacturer. The choice of sealer should be based on local weather conditions, the amount of foot traffic, and personal aesthetic preferences. For example, in areas with heavy rainfall, a water-repellent sealer is essential. See this resource from the Portland Cement Association for detailed information on concrete maintenance and repair. Consider consulting with a professional about concrete repairs and replacements to ensure optimal results.
Repairing cracks promptly to prevent further deterioration
Addressing cracks promptly is essential for maintaining the structural integrity of your sloped concrete footpath. Even small cracks can allow water to seep into the concrete, leading to expansion and contraction during freeze-thaw cycles, which can widen the cracks and cause further damage. Regularly inspect your footpath for cracks, and repair any that are visible as soon as possible. For hairline cracks, a concrete crack filler or sealant can be used. Clean the crack thoroughly, removing any loose debris, before applying the filler. For larger cracks, you may need to use a concrete patching compound. Follow the manufacturer’s instructions carefully, ensuring that the patching compound is properly mixed and applied. In severe cases, where the crack is wide or deep, or if the surrounding concrete is crumbling, it may be necessary to consult a professional concrete contractor to assess the damage and recommend a more extensive repair. Ignoring cracks can lead to significant deterioration, potentially requiring a complete replacement of the footpath, a much more costly undertaking. Remember, early intervention is key to preserving the longevity of your investment. If the cracks are due to ground movement, consider whether excavation and concrete solutions can help stabilise the surrounding soil.
Case Studies: Examples of Successful Sloped Footpath Projects in Penrith, Blue Mountains and the Central West
Highlighting innovative designs and challenging site conditions
Many properties in Penrith, the Blue Mountains, and the Central West present unique challenges for footpath construction, particularly those with steep slopes, rocky terrain, or limited access. Successful projects often involve innovative designs that incorporate retaining walls, steps, or ramps to navigate the challenging topography. For example, a property in Leura with a very steep slope required the construction of a series of terraced concrete steps with integrated drainage to prevent water accumulation. Another project in Oberon involved building a footpath through a rocky outcrop, requiring careful excavation and the use of reinforced concrete to ensure stability. These examples demonstrate that with careful planning and expert execution, even the most challenging site conditions can be overcome to create functional and aesthetically pleasing footpaths. Furthermore, effective communication with the client throughout the design and construction process is crucial to ensure that their needs and expectations are met. A detailed site assessment, including soil testing and surveying, is essential to identify potential problems and develop appropriate solutions.